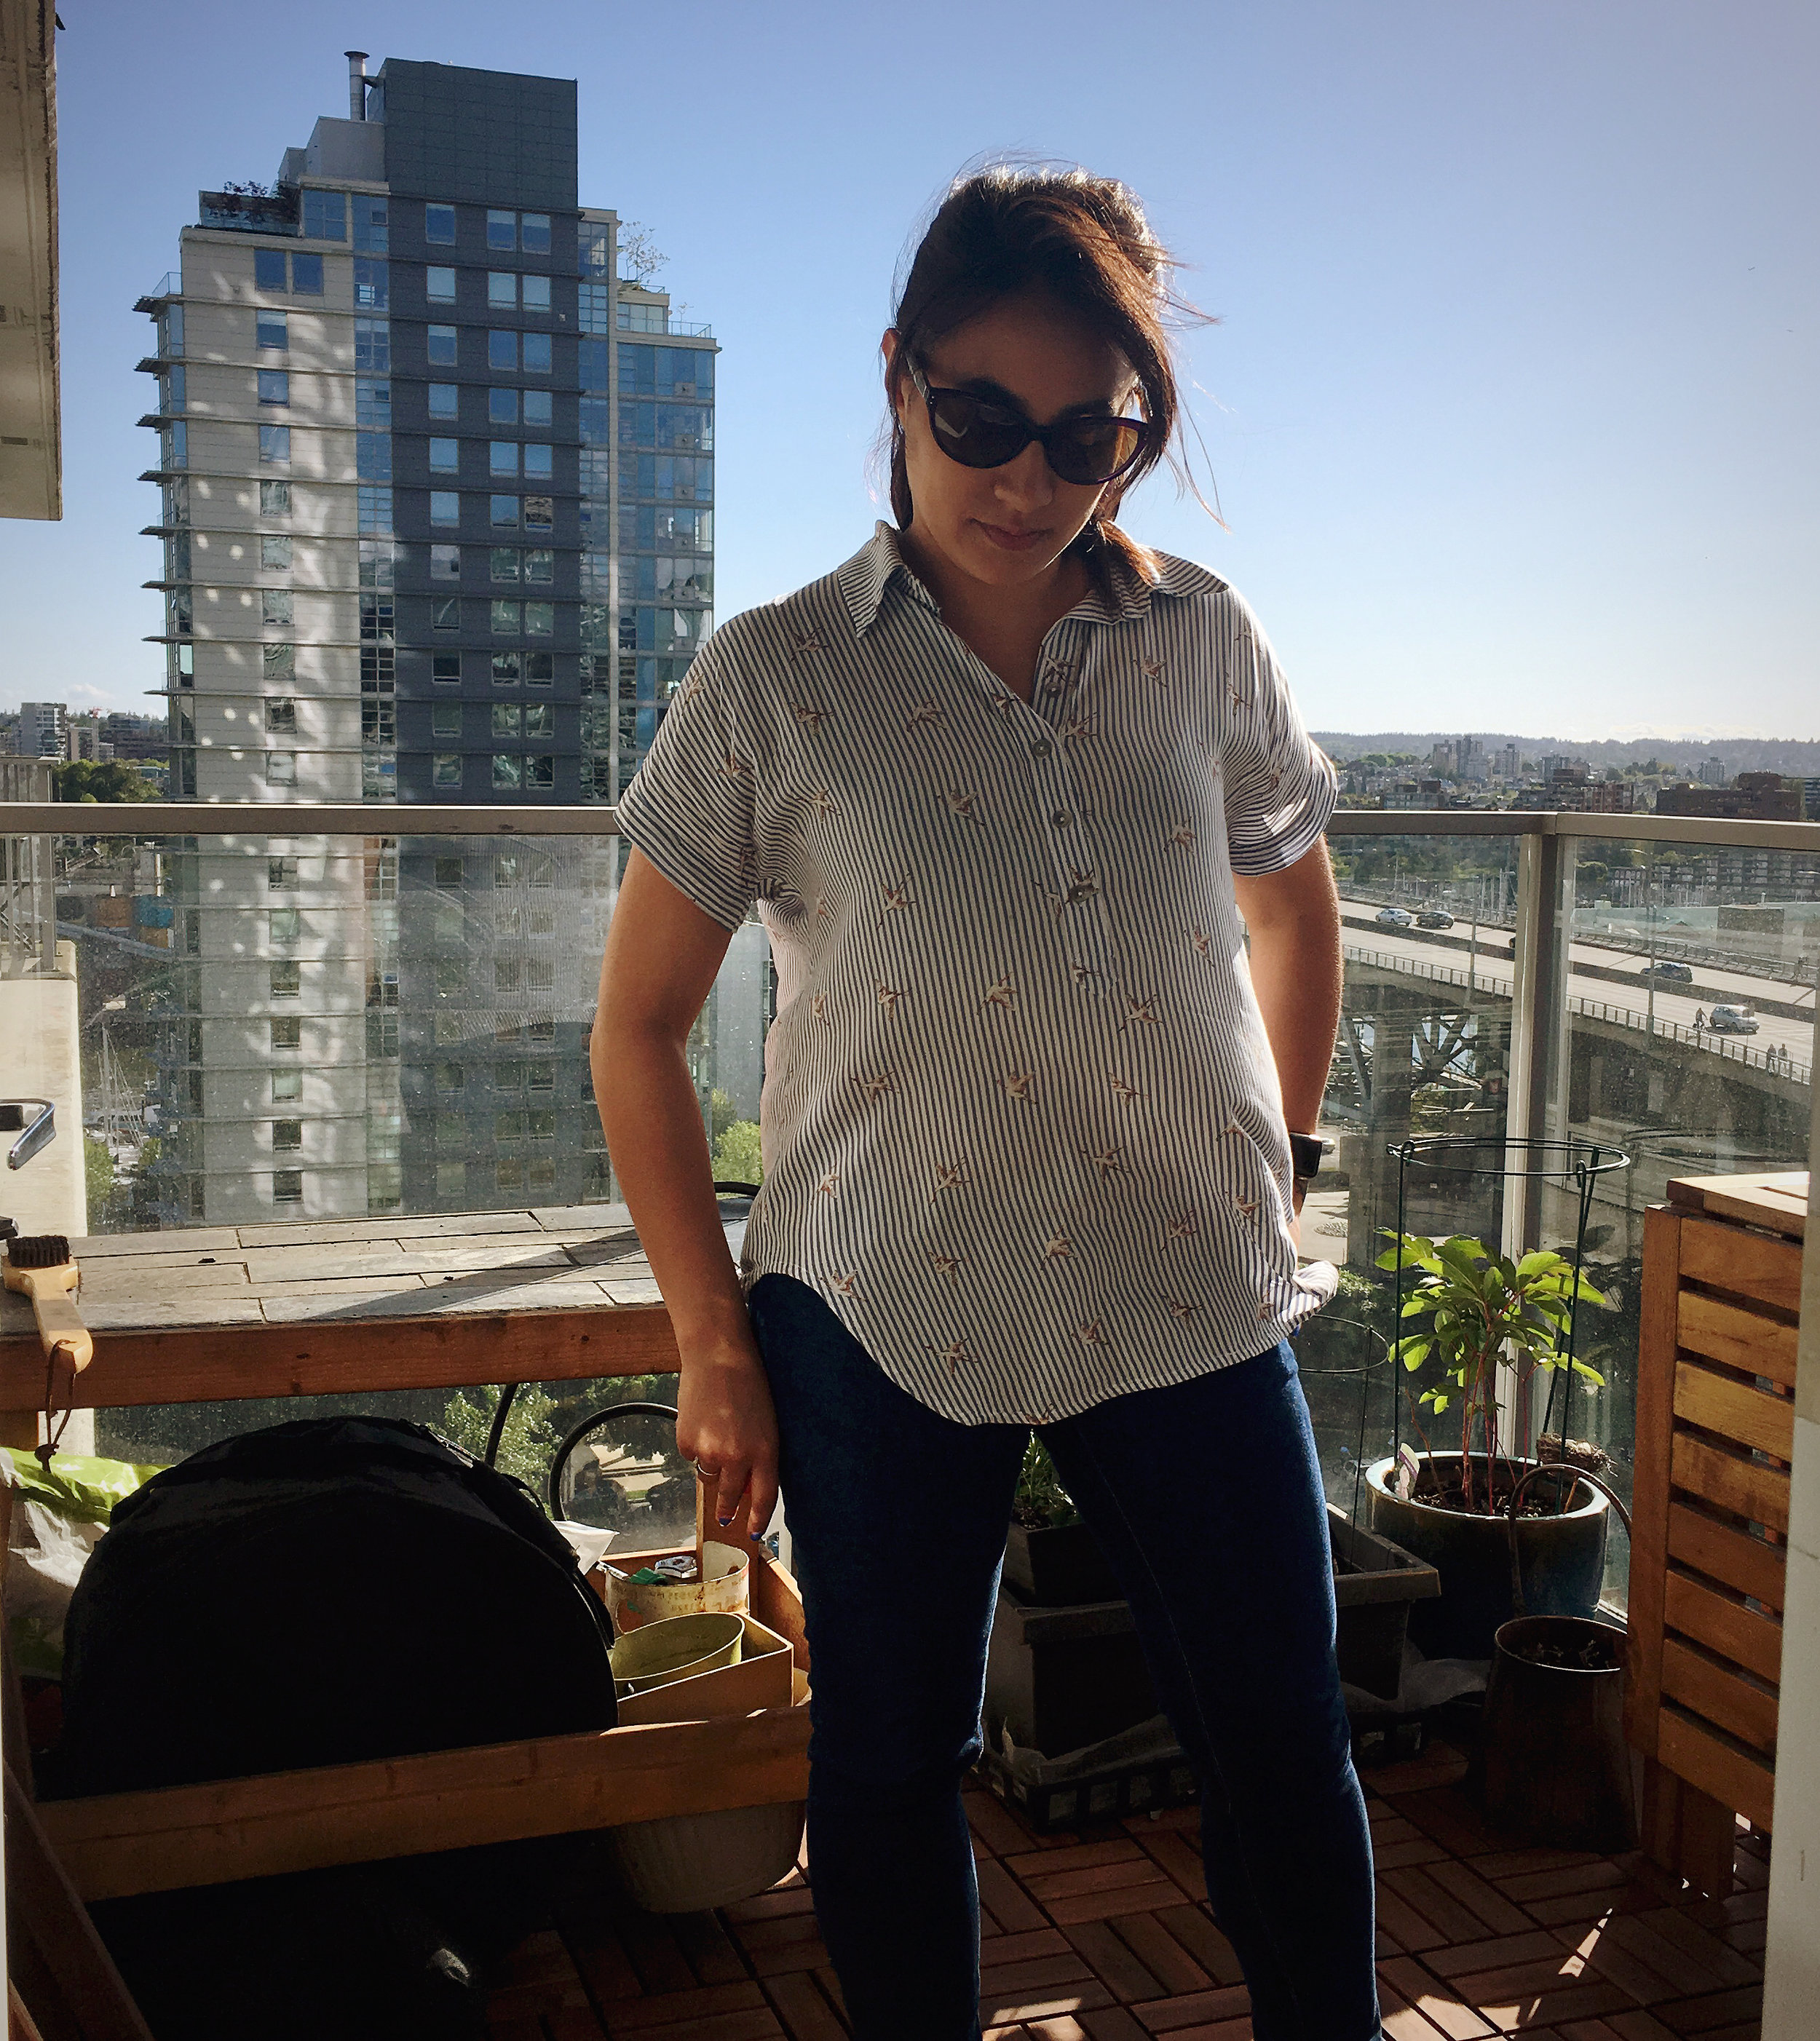
Hi internet friends!
Summer once again ran away with me and before I knew it August came and went! SO much sewing (I think my project total for August was 2 shirts and 3 dresses, not counting the bikinis I'm going to share with you now)! Bikinis at the end of August? why for you ask? BALI :D
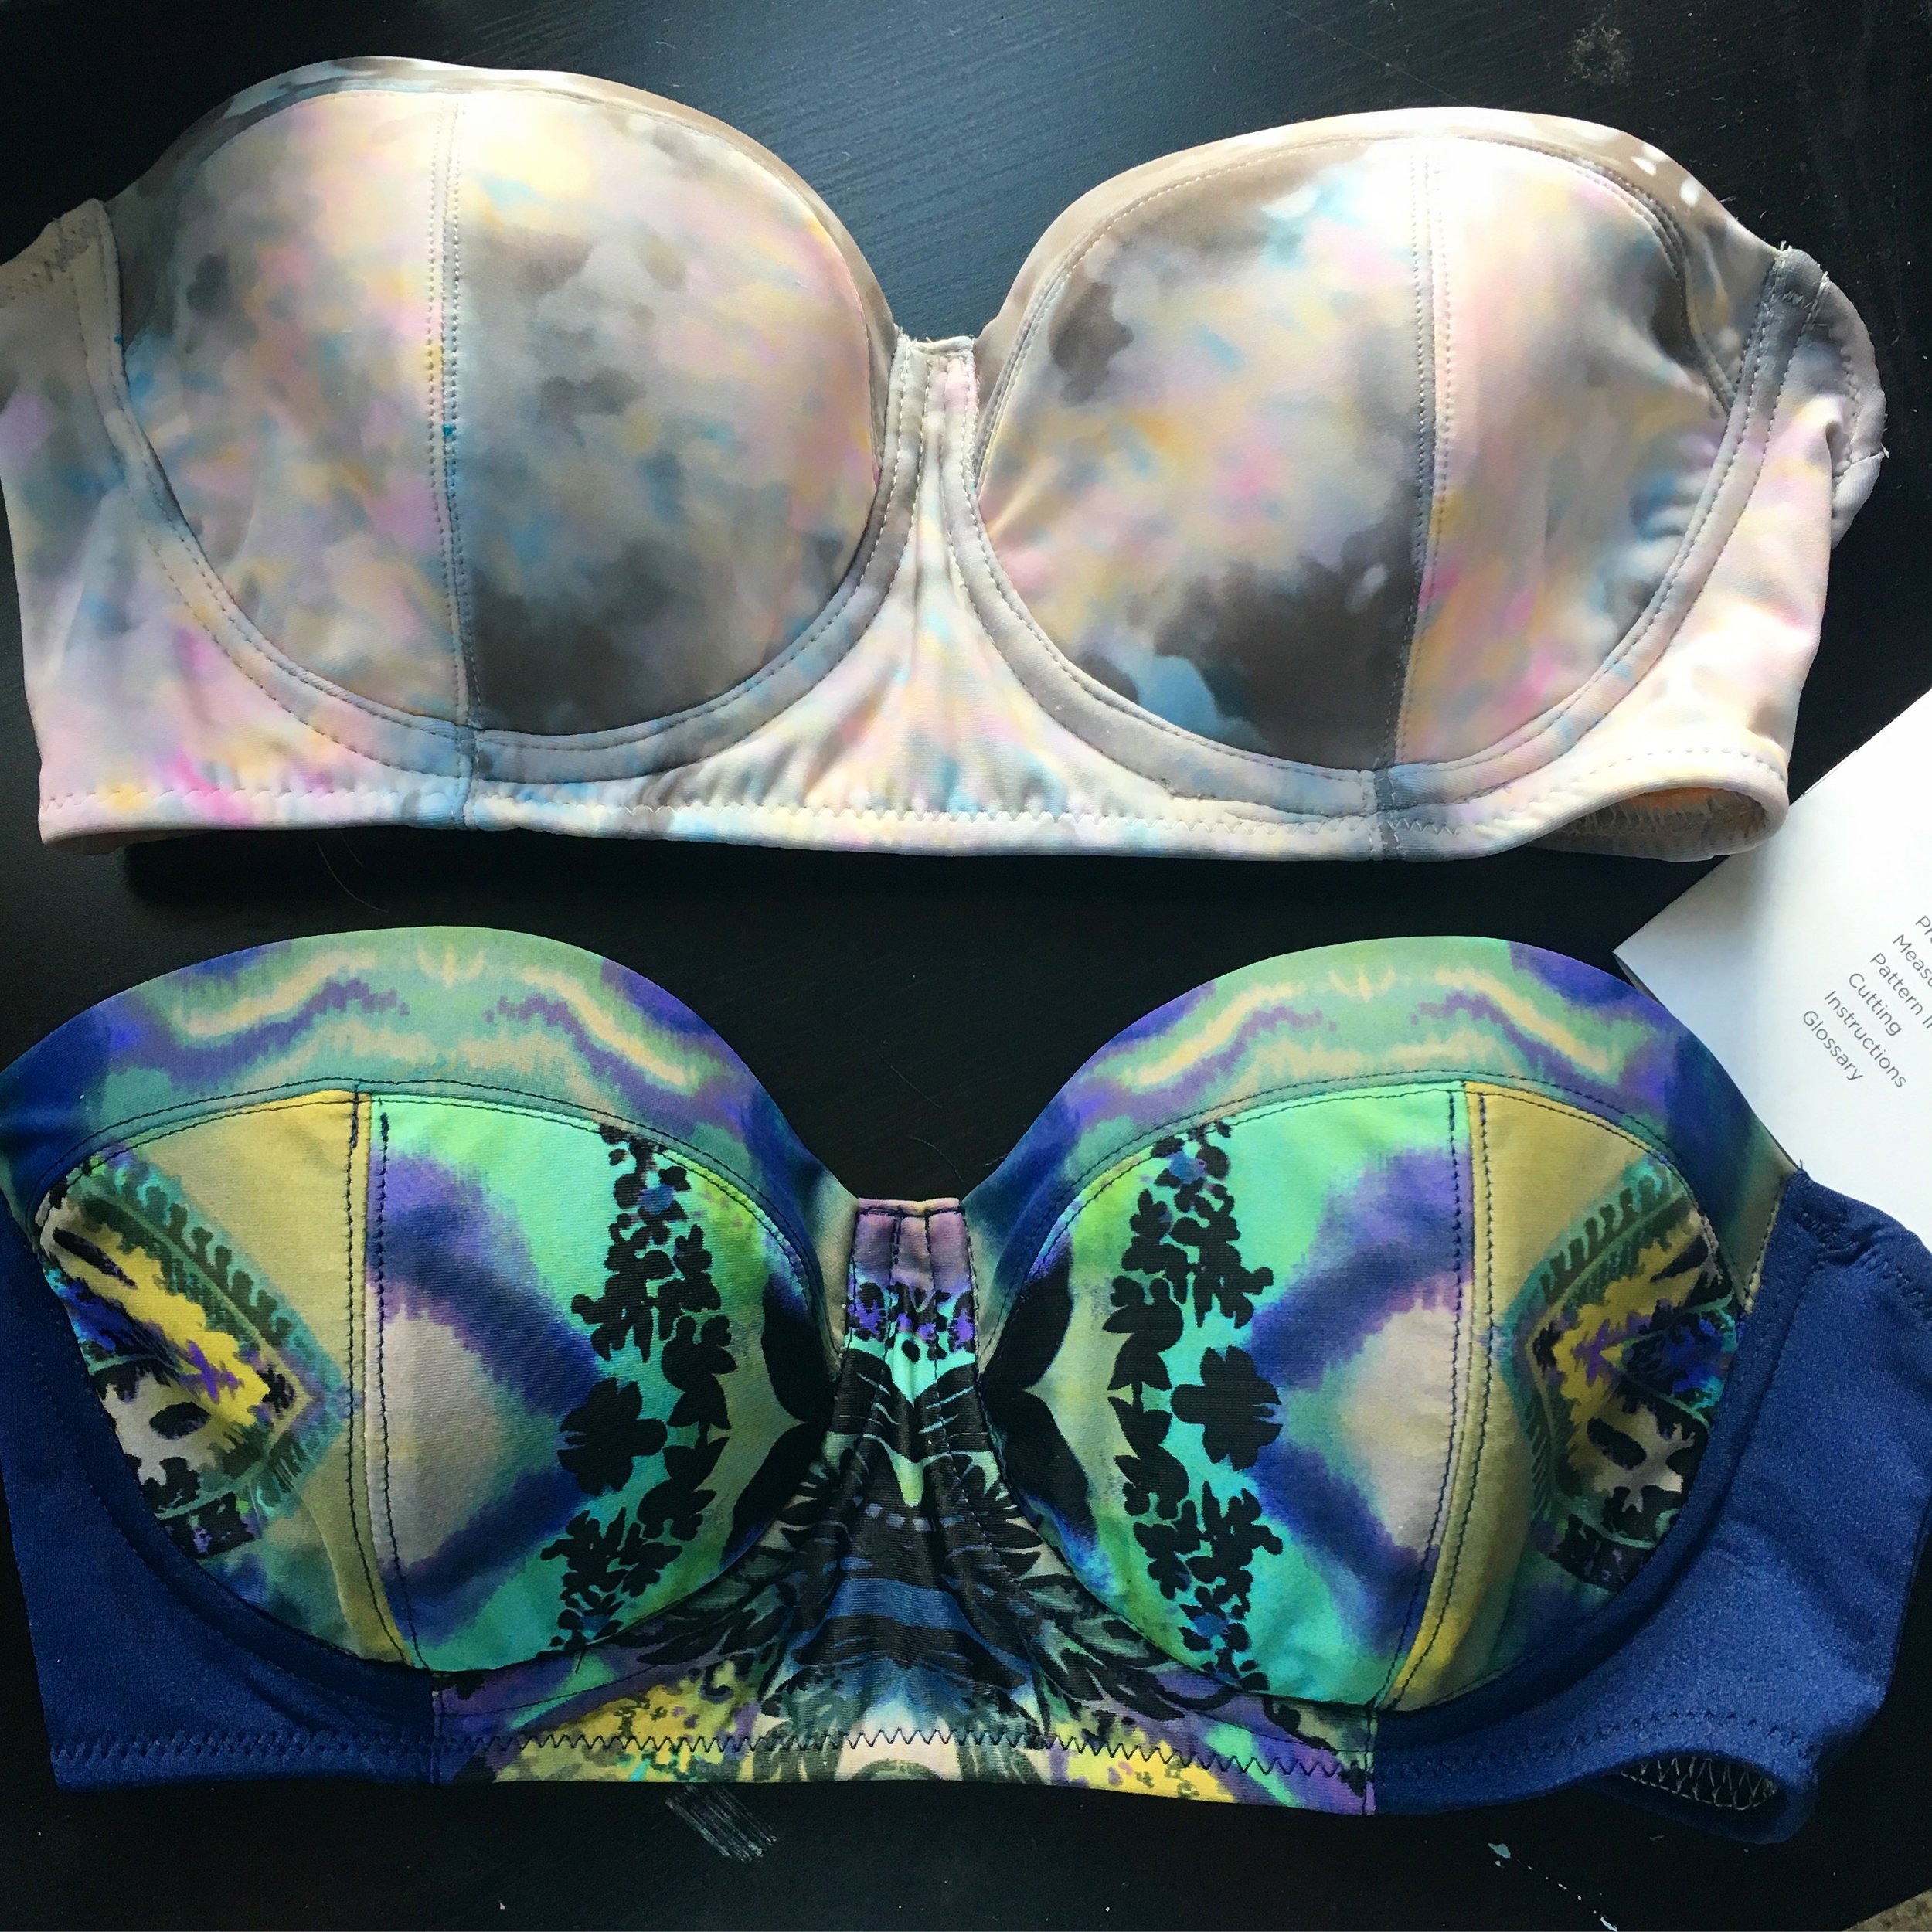
If you've been lurking my Instagram you'll know that I was working on some Sophie Bikinis for our upcoming vacation. Again, Heather has hit it out of the park with this pattern and the accompanying online video course which was full of tips on tricks which really helped me figure out the whole process. I actually made both bikini tops first before working on the bottoms, primarily because I was so stoked about how well the first one turned out (the paler coloured one in the top of the photo above) so I coudln't wait to do the whole process all over again. For the second one I was super stoked with how well the patterning turned out, I spent a lot of time moving around the various pieces around on the fabric but it was still hard to imagine what it would look like all together until it was finished.
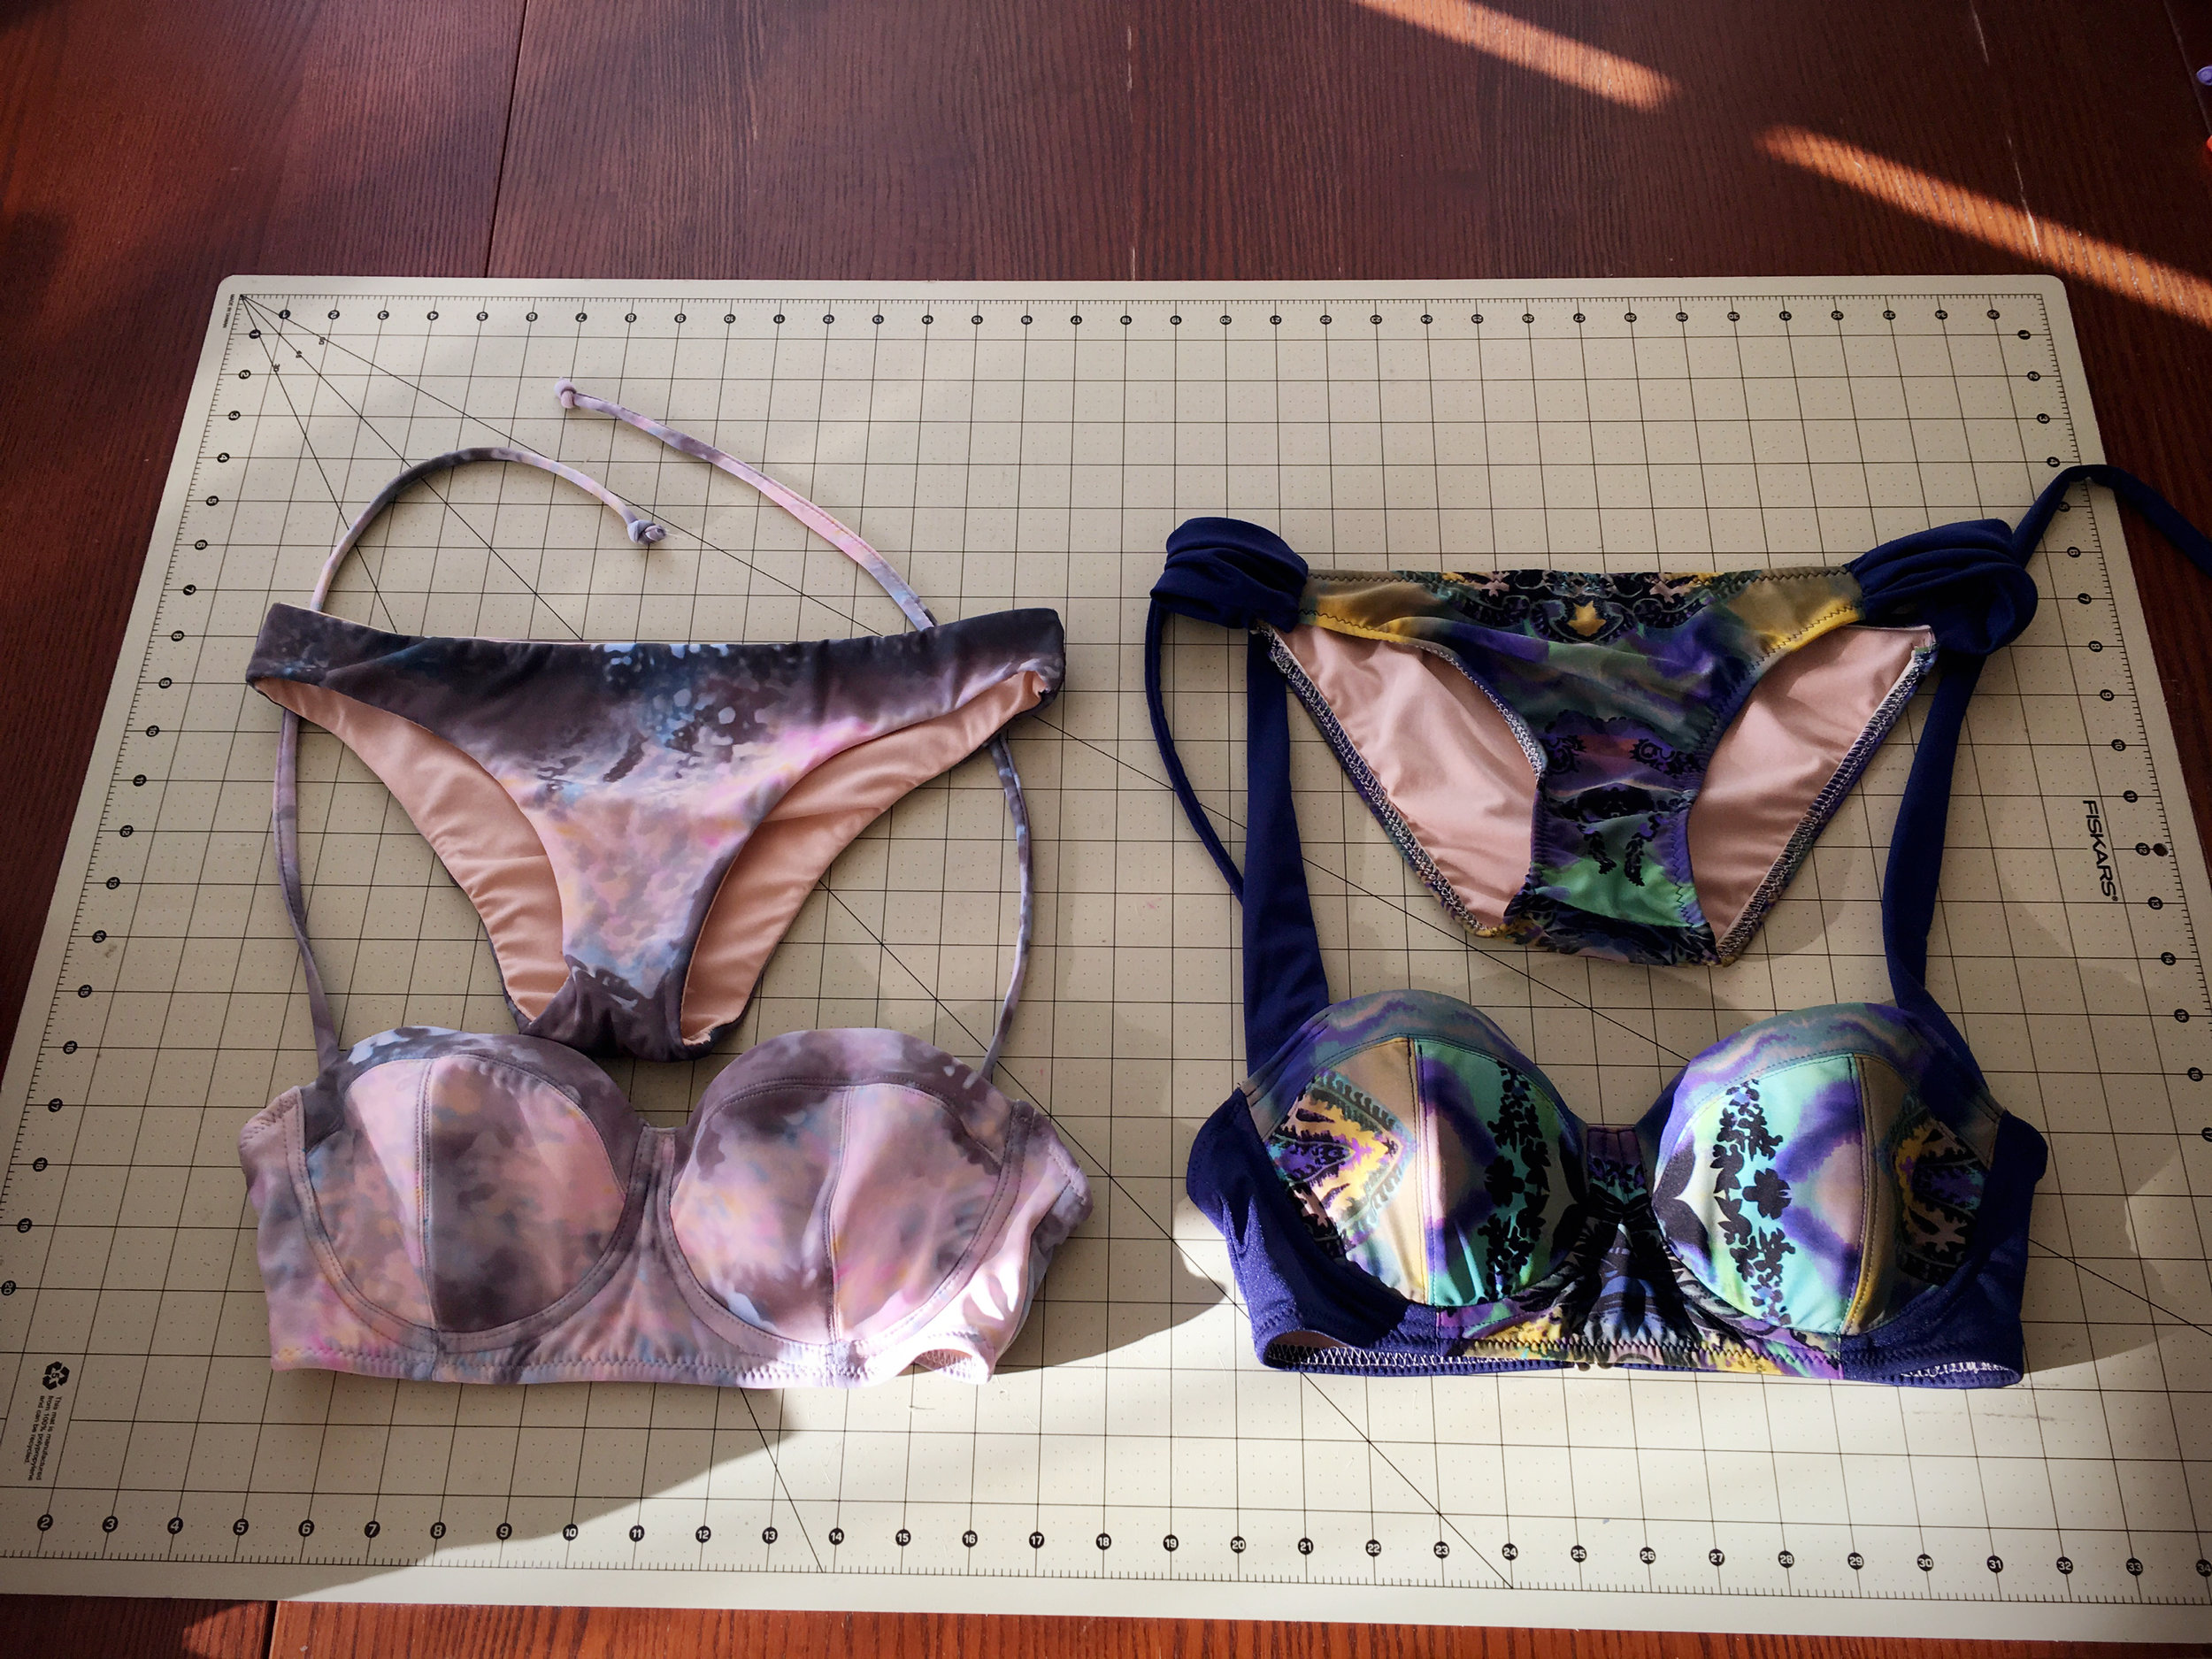
For both bikini tops I cut a size 6, with cup size 5, and wire size 38. The only modification I made was to widen the bridge by 1/4" in the second top (the one on the right in the above photo) to help the cups sit better which resulted in the bridge sitting closer (though not flush unfortunately). For the bottoms I did try to shorten the original high waisted bottoms that came with the Sophie pattern but it didn't really look right, so I ended up doing what it seems most Sophie makers did when they wanted regular and not high wasted bottoms and turned to both the Heiress and the Indigo Ruched Bikini patterns by Swim Style. I ended up with both patterns because I wasn't sure which set of bottoms I would ultimately like and with time running out I decided to try out both. They are more 'cheeky' than any other bikini bottoms I've previously owned but I've been spinning my little heart out at spin class so I actually wasn't too bothered by it when I was sewing everything up and trying them on in my apartment. I did add a bit more coverage to the ruched pair since this set was the one I was planning on swimming/snorkelling and possibly surfing in.
Side bar: I found it really difficult to find swimsuit fabric that didn't have a weird pattern on it.....for the paler swim suit I had to buy a bunch of extra fabric so that I could cut around all the weird letters in the fabric (which didn't actually spell anything) and the weird hash mark things......soooo weird!

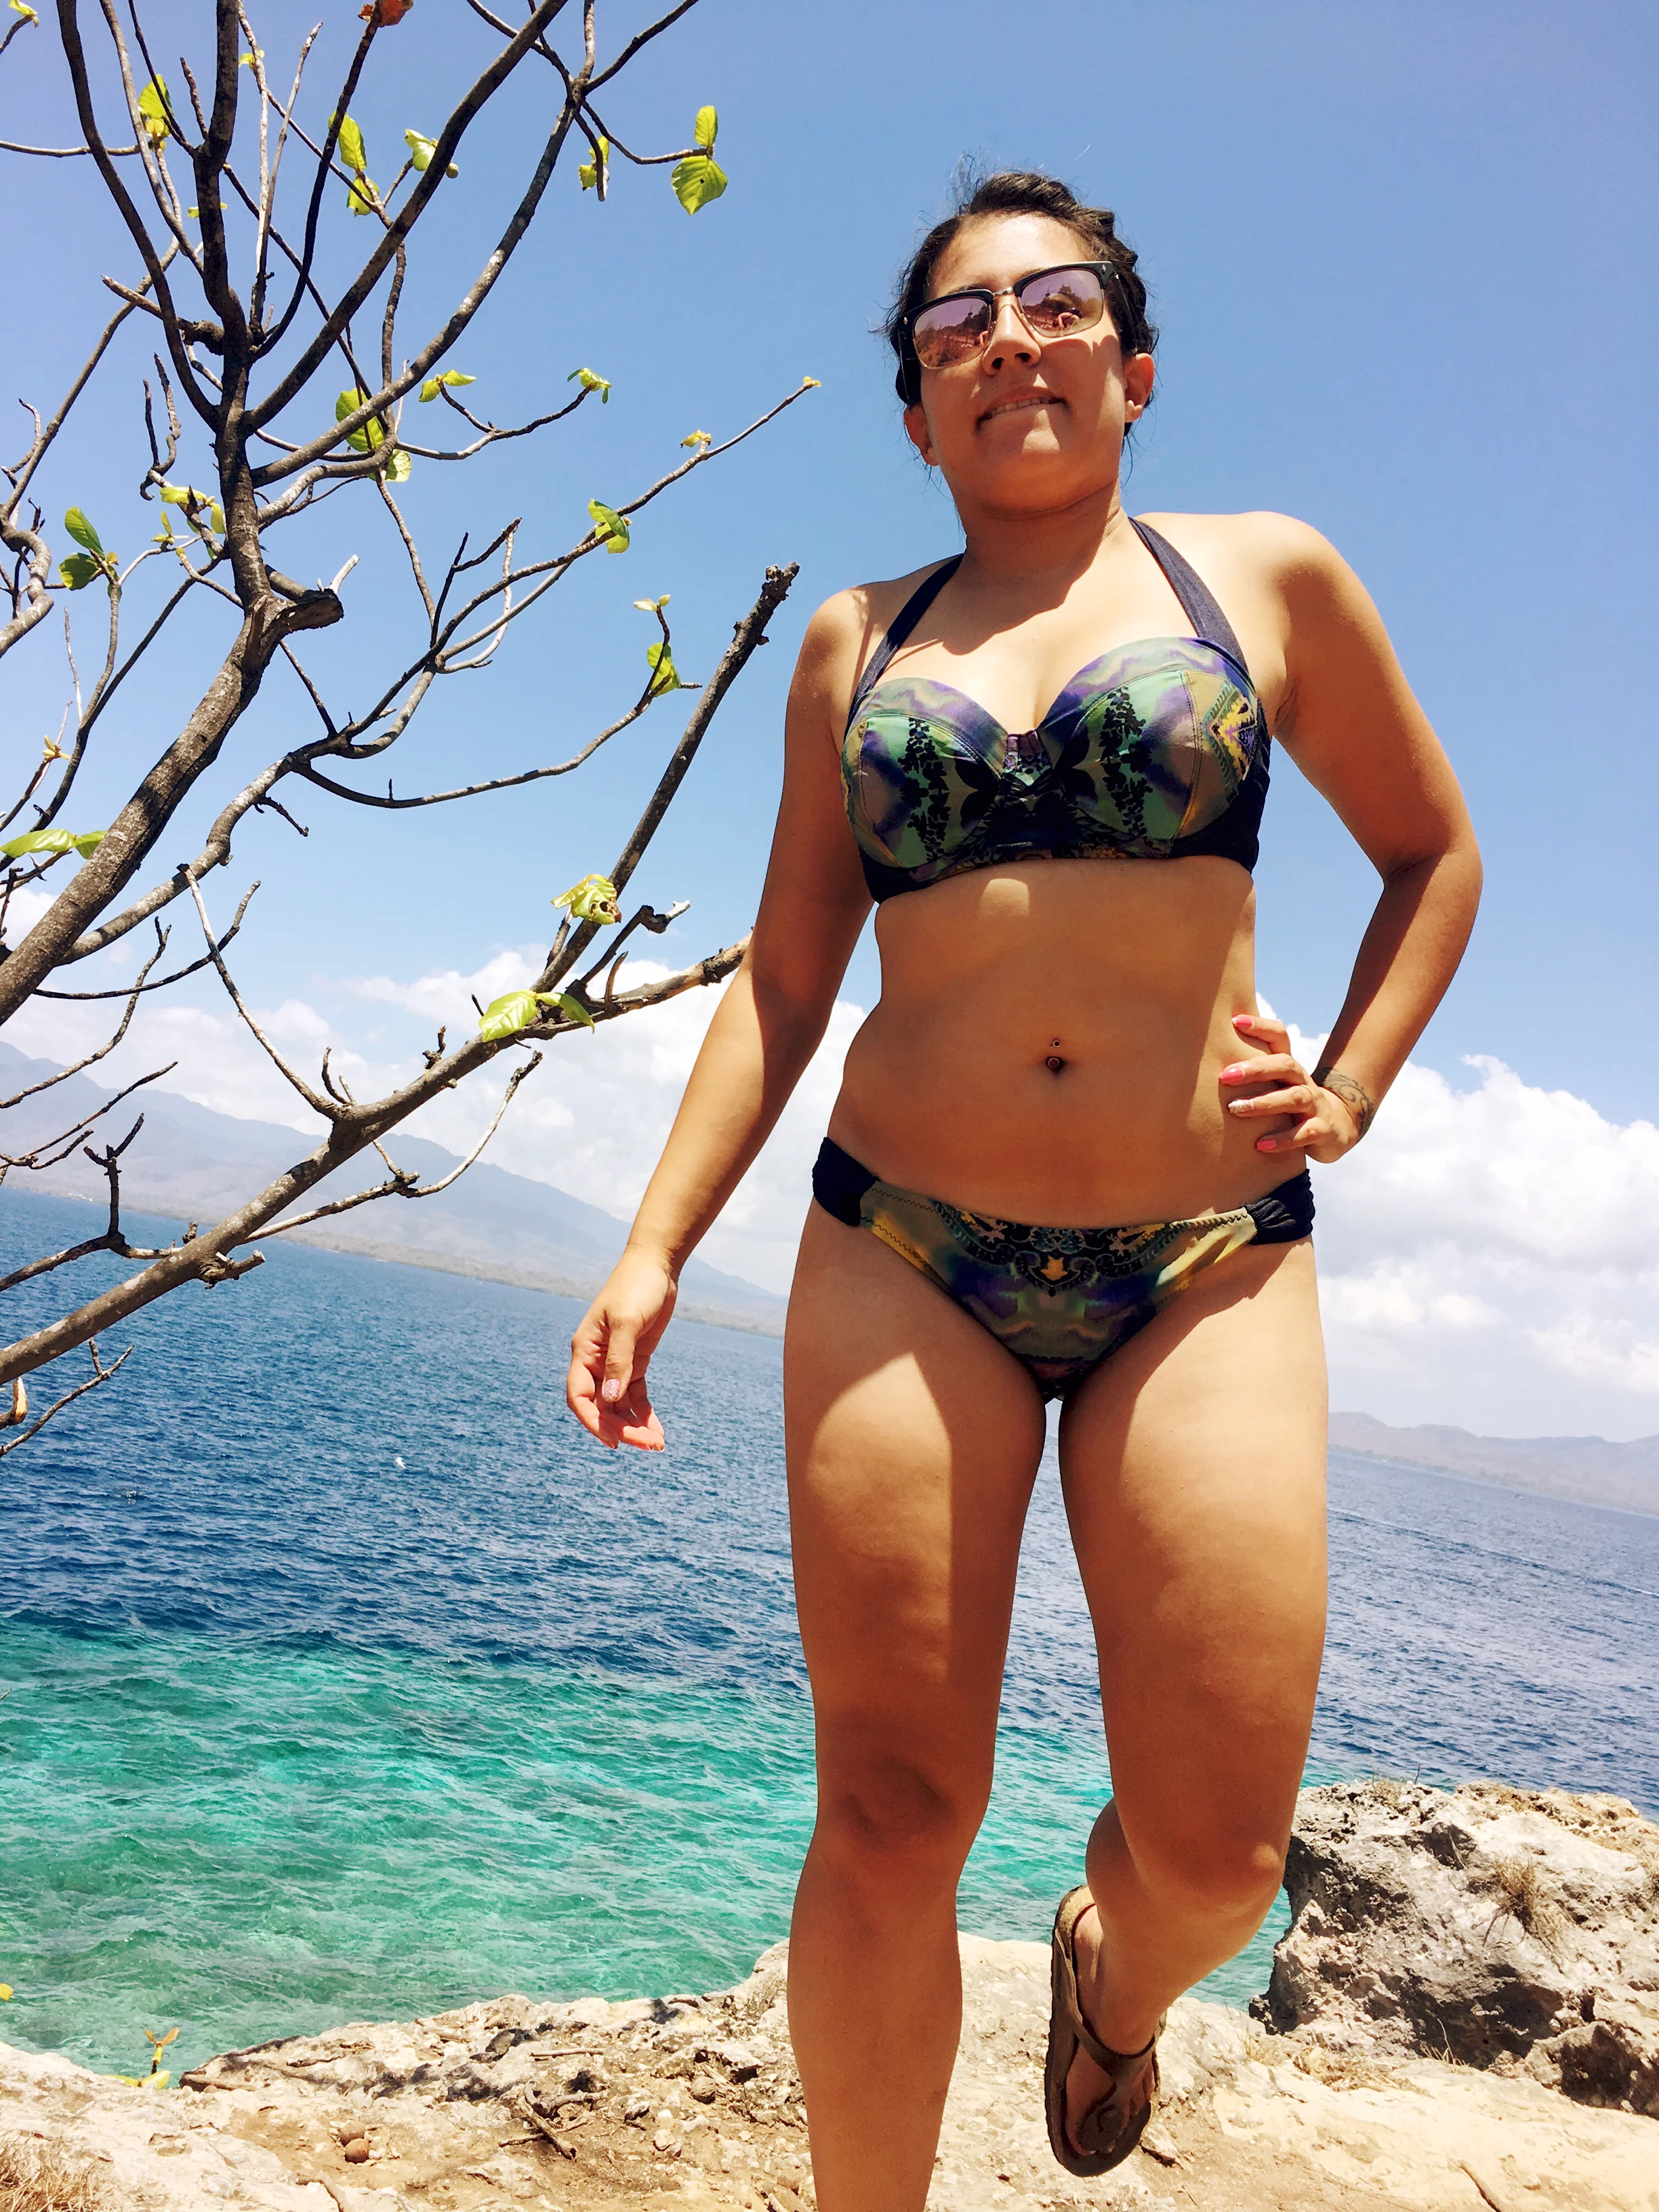
So now we've come to the part of the blog where I'm actually wearing what I've made and while I usually have some apprehension about modelling my makes I didn't anticipate exactly how much how harder it would with with swimwear. Let me preface with that as a kid who grew up spending every summer at our family cottage and the beach I felt super comfortable prancing around in swimwear. This mental body positivity did not go unscathed as I went though my teens but has only gotten stronger, so I though, as I became an adult. I thought I had enough of a body image buffer that modeling my own swimwear would obviously feel uncomfortable but I hoped I wouldn't overly stress about it. PLUS I really loved the way they looked while I was modeling them in my apartment (in all fairness you look good in everything when Bey is blaring through the speakers....) so I was totally confidant that this would all run smoothly. #IGotThis


Turns out that taking photos while on a beach in public in a bikini is quite stress inducing....I stressed a lot on our trip about taking photos, and I got really self-conscious and had to constantly stop myself from comparing what I looked like to others around on the beach. But! ya know what? I did it. I took photos of not one, BUT TWO, handmade bikinis on a beach....in public....and now I'm posting them on the internet...... And while I did not enjoy it at the time I think the pictures look pretty good (at the time I thought they looked horibble but I think it was the heightened self consciousnesses that the process induced)
Thankfully, during our trip the #fluffyblondemonster was his usual super duper supportive self. He even offered to just candidly take photos so that I wouldn't be focusing too much on the photo taking process AND he went ahead and deleted any obviously unflattering photos to help stop me from obsessing over imperfections that only a camera can really catch. He also put up with my pretty much constant refrain of 'do I look fat?' Which looking back upon I'm pretty embarrassed about but I just couldn't shake that feeling, (and to be fair to myself it's not really a normal thing to be posing around in swimwear so I think I should give myself a pass for this hopefully passing self-consciousness) .


The two toned version with the wider straps ended up being my favorite and the set that I turned to most often through out our trip. The bikini fit well and I liked the extra support form the straps, especially when we were snorkeling in choppy waters looking for manta rays (we saw one! it was huge!). The ruched bikini bottom ended up being a big big...I cut the medium size and area coverage wise the size was good, after adding some extra coverage in the rear as mentioned above. But I think that the side, colour contrast parts were too big and I ended up pulling them up a lot while swimming. Luckily, due to the construction method, the side seams are still accessible so I can go ahead and make those shorter to make the bottoms a bit smaller and less likely to move around while swimming.
For the paler set, I ended up making some detachable straps so that I could use it as a strapless top when I wanted. Unfortunately, because the bridge is a bit too narrow, it doesn't quite stay up on it's on comfortably without the straps so I may go ahead and make them permanent. Instead of having the straps attach to the back of the suit, kind of like a regular bra, I decided to just tie them like a regular bikini which I liked the look of. The bottoms were from the heiress pattern, again a size medium, and they fit great! I really liked the hidden elastics construction on this pair and may make an additional one in the fabric of the other bikini for next year :)

staying strong!

my happy place :) knitting on a beach!
Self body image issues aside I think my first foray into swimwear making (and as a result of it being a wired bikini top my first real attempt at bra making!) was a success! yay! :D