
Hello Internet friends!
Today I’m sharing something a bit different, I asked a while back if people would be interested in how I use Trello to catalogue my sewing stash and plan sewing projects and there was some interest so here we are! I’m sorry it took more than a few weeks to write up but I got distracted during writing by all of my Trello boards and ended up planning out more projects 😅. Since there are plenty of online resources on how to use Trello I’ll be focusing more on how I use its features to manage my fabric stash and to plan out projects. So without further ado, let’s get started!
**As a note, this post is not sponsored by Trello, all opinions are my own and I am not affiliated with Trello
First up what is Trello? Trello is a free, online, project management tool that happens to have some handy features for us garment sewists! The biggest plus is it’s visual nature; so long as you can take a picture of your fabric you can visually display it which I find very handy for keeping tabs on my fabric stash and helps me to ‘shop my stash’ instead of buying new fabric. There is a paid version of Trello but I find for what I need to organize my sewing thoughts the free version is more than enough.
Let’s start with the way things are organized in Trello; the 3 main categories of organization are Boards>Lists>Cards, with cards being the most granular type of item (aka the one with the most detail) and boards being the most ‘top level’. In my Trello I have 4 boards, Fabric Stash, Planned Projects, Cut Projects, Finished Projects, and Patterns.
I think the titles of the boards are pretty self explanatory, but don’t worry I’ll be breaking down each board a bit more as we go along. For now we’ll dive into the first board, Fabric Stash, which is honestly where the majority of my organizing happens.
Within the Fabric Stash board I have 4 ‘Lists’, a list is a way to organize individual ‘cards’. In my case I’ve decided that the cards will be all of my pieces of fabric, each card contains info about the fabric that would be helpful in making decision about using it for a particular pattern. Since there are so many types of fabric I’ve used the additional organization tool of lists to bucket my fabric cards: Woven, Knit, Denim, and Canvas & Quilting Cotton. At one time I also had a list of swimwear/bra making fabrics but found I didn’t use it as much so I’ve removed it for now.
Each image of fabric in the above photo is a ‘Card’ which is, again, the most granular form of organization in Trello. Having my fabric stash be so visual is really one of the main reasons I use Trello over other free project management tools, it really makes my stash feel like I’m scrolling through an online shop which I think is a great way to trick your brain into using stashed fabrics over buying new ones. The visual nature combined with the date a fabric was added to the board also allows you to see which pieces have been siting in the stash for a long time and perhaps you could let go of either to another sewists or to a donation. Now, it was certainly daunting to to get pictures of all the fabric already in my stash….when I first set this up almost 2 years ago I ended up dedicating a weekend to completely pull out my stash, organize it into pieces I wanted to keep vs. swap vs. donate, and then to take pictures of and measure each one. I had the help of the fluffy blonde monster to get that all done in a weekend, he was highly motivated by the idea that it would help curb my fabric buying habit (although I guess it’s debatable if that really worked or not 😂). Once I got the backlog of my stash entered, it was easier to maintain since I would try to put in fabrics as I got them, which is super easy if you online shop since you can just save the image of the fabric from the website and then drop it into Trello!
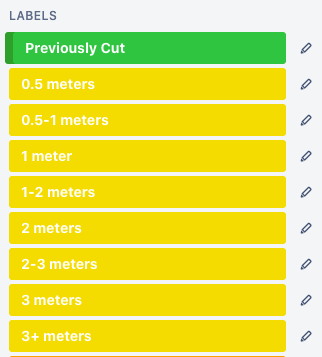
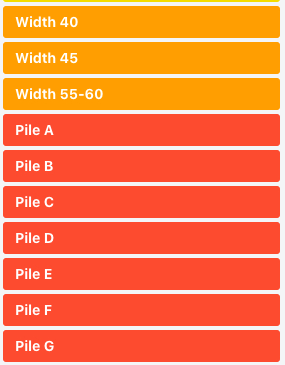
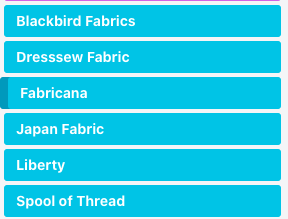
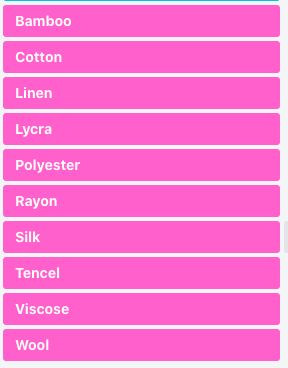
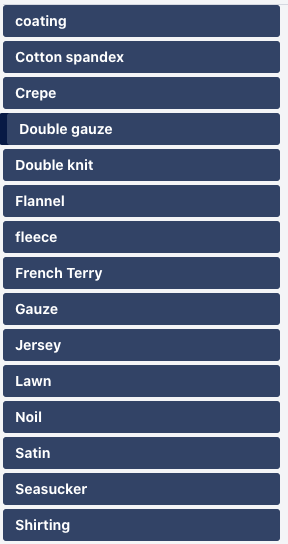
You’ll notice that under each picture are a bunch of colourful boxes along with the name of the fabric. These colour coordinated boxes are another great feature of Trello, they are called labels. They way I have my label tags set up allows me to see, at a glance, how much of that fabric I have (length and width), where I got it from, what material it’s made from and why type of fabric it is. The labels are easy to set up and allow for simple clicking to select which ones to apply to each card, which saves typing things out in the description section. They are also searchable, so I can quickly see all of my fabrics of a certain length, for example, over the entire board or on a particular list which aids in project planning. I’ve taken a few screen shots of my label types and put them in the gallery below if you are interested in what labels I currently use. (The red label category I use for where I’ve stored that fabric, it says Pile but each is really an Ikea tote box. I think they originally got labeled pile when I was doing that initial set up because everything was in a piles and I never bothered to change the name to box. Eagle eyed readers will notice that not all of my cards in the upper photos have a ‘Pile’ associated with it, we’re currently re-organizing our Den, aka my sewing room, so things are a bit in flux now but hopefully it will all be sorted soon. )

Now that we’ve gone over stash management let’s move onto planning! The next board I’ll talk about is my ‘Planned Projects’ Board.
On this board I use ‘lists’ a little differently, each list is a planned sewing project. In the title of each list I put the pattern name and then within the list I place the fabric, or fabrics, I’m thinking of using for that project. To add the fabrics I simply go to that fabric card in my ‘Fabric Stash’ board and move it to the ‘Planned Projects’ board under it’s intended sewing pattern list.
By moving the card instead of duplicating it I’ve effectively earmarked that fabric for a specific project that way I don’t accidentally plan two projects with one piece of fabric. If I change my mind on a project all I need to do is then move that fabric back to the ‘Fabric Stash’ board so that it can be selected for something else. In addition to this digital planning board, I also have a spread in my bullet journal that I call my ‘Sewing and Knitting Brain dump’ which I use when I have a sudden idea or thought that I want to jot down quickly. I also keep my most recent measurements on that spread for easy reference along with a few fashion croquis from My Body Model, so that I can sketch an outfit out if I like.
Once I’ve decided to commit to a sewing project I then move the entire list from the ‘Planned Projects’ board to the ‘Cut Projects’ board.
The reason why I distinguish between ‘planned’ and ‘cut’ projects is two fold: 1) it helps me to visually see ideas I may have come up with on the fly and put on the planning board vs. ones that I’ve committed and cut already and 2) since I like to batch cut projects mostly during large blocks of time on the weekend it lets me quickly see my sewing options during the week when I feel like sewing for an hour or two
. A sewing project list will stay on this board until I’ve completed sewing it, at which time it moves to…you guessed it by now! the ‘Finished Projects’ Board.
With this board I like to keep project lists for the projects I’ve completed that year, it’s a nice way to see what you’ve sewn in a year! Once the year is over I archive the list meaning that the list and the fabric card are still kept ‘in the Trello cloud’ but they aren’t visually on the board.
You’ll notice in the above photo, and a few other photos in this post, that some of the project lists have two cards in them, a fabric card and a pattern card. This brings me to my last board, ‘Patterns’, which I’m still working on getting sorted.
For this board I’m trying to keep a visual record of patterns that I have as well as if I’ve made that pattern previously (you can see in the above photo some of the labels that I’m using on this board to help keep track). The goal here is to have all my patterns indexed to make for easy pattern/fabric parings, and to further help with the visualization of a project as I’m planning it. I also intend to use the comment section of each pattern card to keep notes on any modifications that I have made to the pattern for fitting or for pattern hacking purposes. The reason it’s taking so long is that I currently keep all my PDF patterns on drop box and ideally I would like to have a link to each pattern in Trello to make it a one stop shop for finding a pattern quickly then looking it up to get, for example, the fabric requirements. I made a good dent in this cataloguing last fall but it’s a bit more labor intensive to put each card together so it’s going to be awhile until my entire pattern collection is complete.
You may be wondering what I use for knitting project planning…luckily for us knitters/crocheters Ravelry exists which is kind of like how I use Trello but on steroids! You can buy pretty much any knitting/crocheting patter on there, plan your projects, leave reviews, categorize your stash, and chat with others in the knitting/crocheting online community! I would highly recommend Ravelry as an option if you are looking for ways to stash manage/plan knitting/crochet projects.
Well, that’s it for this post! Let me know if you have any questions in the comments on how I use Trello for my stash management and sewing planning!